Two Bundle PCL Reconstruction using quadruple Hamstring tendons and biodegradable interference screws
Andreas C. Stähelin, M.D.*, Richard Feinstein, M.D, Norbert Südkamp, M.D., Andreas Weiler, M.D. **
*Private practice, St. Alban-Vorstadt 51, CH-4052 Basel, Switzerland Tel: #41/61/2730909, Fax: #41/61/2730905, e-mail: kruzlifix@staehelin.ch
**Trauma & Reconstructive Surgery, Virchow Klinikum, Humboldt-University, Augustenburger Platz 1, D-10555 Berlin Tel: #49/30/45052012, Fax: #49/30/45059969, e-mail: asw@ukrv.de
Correspondence to A.C. Stähelin, M.D.
Keywords: Posterior cruciate ligament - two bundle technique - semitendinosus tendon - gracilis tendon - biodegradable interference screw
Summary:
A modification of a minimally invasive and endoscopic posterior
cruciate ligament (ACL) reconstruction technique is presented. A two bundle quadrupled
semitendinosus-gracilis "Y- shaped" tendon graft and direct fixation with
biodegradable interference screws is used.
In the medial femoral condyle two femoral tunnels are created inside-out
through a low anterolateral arthroscopy portal. First, in 90 degrees of flexion the
double-stranded gracilis graft is fixed with a soft threaded biodegradable
poly-(D,L-lactide) interference screw inside the lower femoral socket. In full extension
the combined semitendinosus-gracilis quadruple-stranded graft end is fixed inside the
posterior aspect of one single tibial tunnel under 80 N of pretension. Finally 80 N of
pretension is applied to the double-stranded semitendinosus tendon proximally and in 90
degrees of flexion the second tibial interference screw is inserted. Using this technique,
the stronger semitendinosus part (anterolateral bundle) is fixed in flexion whereas the
smaller gracilis tendon part (postero-medial bundle) is fixed in full extension. The free
part of the graft is thus not longer than the intra-articular distance, which avoids
excessive elasticity of the ligament.
This technique allows a better restoration of PCL kinematics and is
especially advantageous when both, the anterior and posterior cruciate ligaments have to
be reconstructed and the knee-joint has to be reduced to its neutral position.
Surgical Technique
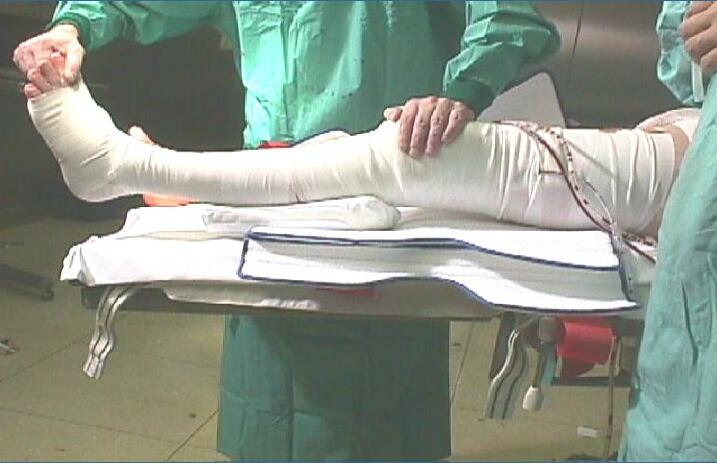
Preparation and Positioning of the Patient:
The patient is placed in the supine position on the operating table. Next to the thigh is an abduction post. The knee is flexed to 70 degree, and the foot is supported with a roll fixed to the table (Fig. 1). The first portal is far lateral to the patellar tendon just above the joint line. The second portal lies medial to the tendon just underneath the inferior patellar border. A postero-medial portal is later created under direct arthroscopic vision (Fig. 2). The hamstring tendons will be harvested through a skin incision approximately 2 cm distally and 1 cm medially to the tibial tuberosity along Langer’s lines and 4 cm in length. The subcutaneous tissue of the arthroscopy portals, the skin incision for the graft harvest and the knee-joint are infiltrated with carbostesin / epinephrin solution.
Graft-Harvest:
The leg is externally rotated and the knee-joint flexed to 60°. The skin incision should be situated just distally to the superior border of the pes anserine which often can be palpated underneath the skin. The most superficial layer of the pes anserine is opened in line with the skin incision. The gracilis- and the semitendinosus-tendon can be identified by palpation as they separate and pass over the postero-medial border of the tibia. The first tendon is delivered from the posterior part of the incision with the use of a curved tendon hook. All tendinous slips to the fascia of the medial gastrocnemius muscle have to be identified and transected. The tendon is pulled as far as possible out of the wound and the tendon is proximally transected using an open ended tendon stripper at a distance of approximately 18 cm. The second tendon of the same length is harvested in a similar fashion.
Graft-Preparation:
Both tendons are left attached at their distal tibial insertion. The free tendon ends are clamped together with a Kocher clamp in such a fashion the semitendinosus loop is approximately 1 cm longer than the smaller gracilis loop. The tendons are individually doubled over two large non-absorbable sutures. The tendon ends are held with the Kocher clamp to their distal tibial insertion while tension is applied to both holding sutures. The distal 3 cm of the four tendons are sutured together using a running baseball stitch, leaving the large absorbable suture attached. Proximally both strands of the two tendon loops are sutured individually to each other over the distance of 2 cm (Fig. 5). The length and the exact diameter of the graft is checked using the sizing holes of a graft handling block. The prepared Y bundle graft is placed back into the wound for storage until it is inserted.
Femoral Sockets:
After a thorough and careful endoscopic examination of the knee, the knee-joint is placed in 70° of flexion. With an intra-articular electrocautery or a shaver the ruptured PCL is removed from the medial wall of the intercondylar notch. A small remnant is left attached to the medial wall in order to mark the footprint of the original PCL. For the next step, the arthroscope is changed to the lateral and a full radius resector is introduced into the medial portal. The entrance of the more superior of the two femoral sockets is marked approximately 13 mm below the top of the roof and 13 mm posterior to the beginning of the articular cartilage is created. One may use the special screw driver of the bioabsorbable screw or any other suitable instrument, to penetrate the cancellous bone. The more inferior socket entrance is performed at a point which lies about 20 mm down from the top and just 8 mm away from the border of the articular cartilage. A femoral 7 mm dilator is pushed into the bone using a mallet. Once the 40 mm long dilator is fully inserted, an oscillating rotation of the flat dilator will create a cylindrical hole (Fig. X). Using a 2.4 mm beath pin a loop of a white non-resorbable suture (semitendinosus) is pulled via the antero-lateral arthroscopy portal into the superior femoral socket and out through the lateral femoral condyle. The suture loop is pulled just into the femoral socket. In a similar fashion a green (gracilis) non-resorbable suture is pulled via the antero-lateral arthroscopy portal into the inferior femoral socket and out through the lateral femoral condyle. Again this suture loop is pulled just barely into the femoral socket
Postero-medial portal:
At this time one might want to establish an additional postero-medial portal. This portal lies approximately 2-3 cm above the joint line and under direct endoscopic vision we insert a long spinal needle to find the optimal location. With the shaver inserted through this portal and under direct vision of the anteriorly introduced arthroscope the exit of the tibial tunnel can be cleaned off any remnants of the posterior cruciate ligament.
Tibial Tunnel:
We like to switch the arthroscope now to the postero-medial portal. The tibial tunnel guide is introduced into the knee-joint and pushed far back over the top of the tibial plateau. Here its correct position is verified under direct arthroscopic vision. Once the guide is well placed the obturator of the drill guide is hooked into the medial tibia just about at the area of the pes anserine.A 2.4 mm guide wire with drill tip is drilled through the drill guide. The tip will perforate the tibia under direct visual control and will be accepted by the spoon shaped part of the drill guide Then length of the tibial tunnel is measured and recorded. The drill guide is removed and the periosteum at the wire entrance is incised and freed with a small rasp. Often there will be some bleeding which should be stopped using electrocautery. Using the cannulated 10 mm tibial dilator like a drill bit one perforates the cortical bone. In hard bone this part of the procedure can be performed with a conventional motorized 10 mm drill bit. The tibial dilator is advanced just into the subchondral dense bone of the posterior using oscillating motions and if necessary a mallet. ( The transtibial saw is used for the penetration of the dense subchondral bone and to remove remaining rests of the old PCL. Using the manual transtibial saw one is able to correct the exact tunnel exit by a few millimetres in all directions. After penetration of the joint the saw has to be advanced and oscillated further until all soft-tissue fibres are disconnected so that the bone plug can be removed by withdrawal of the saw.
Graft-Passage:
Using a pigtail suture-passer a green and a with suture are now inserted in to the tibial canal and brought over the top of the posterior border of the tibial plateau. An arthroscopic grasper is now inserted into the loop of the previously placed suture lying inside the superior femoral socket. The white suture of the back of the knee joint coming out of the tibial tunnel is pulled anteriorly through the suture loop. Once the suture is pulled through the look the loop itself is pulled out of the medial femoral condyle and the skin. The same procedure is performed using the green sutures. This way both sutures are pulled trough the tibial tunnel into the femoral socket. The two sutures of the femoral ends of the graft are now tied to the pull-through sutures. The Y-graft is now pulled through the tibial tunnel into the femoral sockets. Care has to be taken that the graft is not twisted. Is this the case the graft can be with drawn out of the tibial tunnel and twisted to correct the twists inside the knee-joint. Both femoral ends are pulled about 20 mm inside the femoral socket so that the sutures in the tendons are no more visible.
Graft-Fixation:
The first biodegradable screw (Sysorb®, Sulzer Medica, Münsingen, Switzerland) is inserted from the low anterolateral portal into the inferior femoral socket (gracilis, posteromedial bundle). The screw should be pushed hardly into the socket and turned counterclockwise for one full turn. The graft is held tightly with the holding-sutures at both ends to prevent the screw from catching superficial graft-fibres. The screw is screwed just underneath the joint surface. 80 Newton of pretension is applied to the tibial end of the graft. The joint is brought several times through a full arc of motion (Fig. 11). The length of the tibial tunnel has been previously recorded and should be marked on the screw driver using a rubber band. With the knee in full extension, the tibial interference screw is inserted until the rubber-band is just touching the tibia (Fig. 12). The knee-joint is brought to 90° of flexion and with 80 Newton tension applied to the femoral end of the semitendinosus graft (posteromedial bundle) the third biodegradable screw is inserted in a similar fashion as the first one. To enforce the tibial fixation we often tie the suture around a bony bridge at the outer edge of the tibial canal.
Posterolateral Reconstruction
The posterolateral instability is reduced by using a semitendinosus graft harvested from the opposite knee-joint. A 4.5 mm hole is made in the fibular head and the SemiT graft is pulled into a 7 mm wide 40 mm long dilated hole near the lateral femoral epicondyle at the proximal attachement site of the lateral collateral ligament. The graft is pretensioned and directly fixed to bone using a first biodegradable screw.
Rehabilitation
We basically use similar principles as in ACL surgery, but are not as
liberal. for the first 6 weeks a Posterior Tibial Support Brace is
used. From then on for 6 weeks only at nite. Here one can find a extensive physical
therapy protocoll but again, one has to tailor the rehabiltation to each individual
patient, his demands and capabilities.